How to build a bed in a van
Since we’ve been training hard for climbing all last fall and winter we decided to try and make the most of spring, summer & fall and go on a RAMPAGE in Colorado. At the same time, our tick list of places in/around Colorado have expanded to a hefty one…as far as we could tell there was only one solution to this. Mini-Road-Trip-Mania!
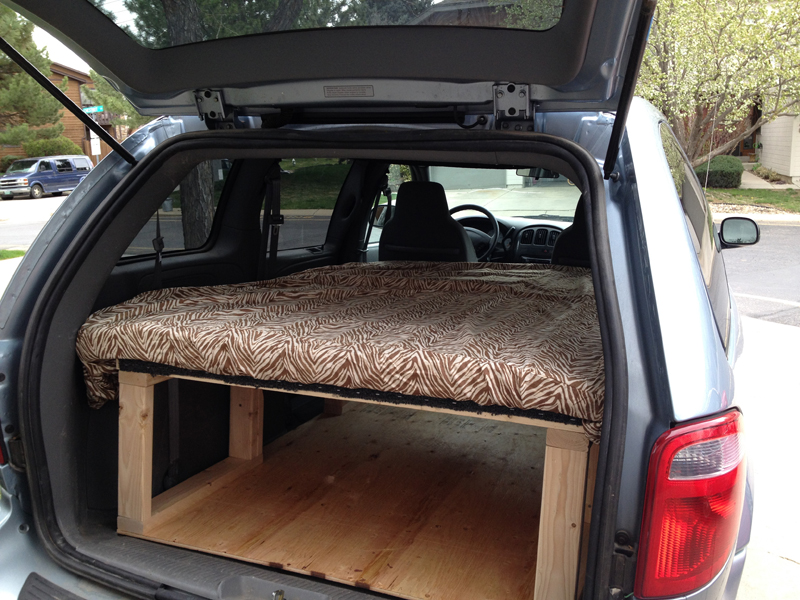
After last summer’s camping excursions, we found that we were very uncomfortable and our (now old) bodies need a little more TLC than they used to. The only logical choice was to build a super comfy bed in the back of our mini-van, with loads of storage underneath for all our camping/climbing/adventure goodies.
So the question: How do we build a bed in a van?
 We figured out some great tricks and tips along the way. We managed to do this for $110 bucks, though the cost will vary depending on the tools that you may or may not already have and the quality of materials purchased. The only tools we didn’t already have were a couple good sized clamps, a few safety items and wood screws. We wanted to make it super easy for others to do this also, so we have documented the instructions and the materials required.
Materials
*note – measurements were for our specific van, so your measurements may require slightly larger or varied sizes of plywood/wood for this project. We have a dodge caravan standard size (not extended)
- 4 – 2’x4’x8′ pieces of wood
- 4 – 2’x2’x8′ pieces of wood
- 2 – 1/2″ 4’x6′ plywood
- 1 roll of cheap carpet 4’x6′
- 1 box 2″ screws
- 1 box 3″ screws
- 2 – 12″ clamps
- safety goggles
- safety masks
- sanding device
- circular saw
- drill
- thick working gloves
- ruler/tape measure
- pen or pencil
- table or saw horse
- scrap wood for shims
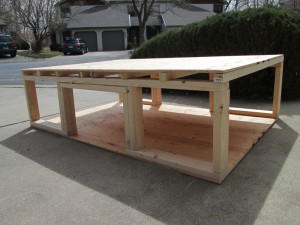
Our setup is pretty straight-forward…nothing overly fancy and pretty much built right up against all sides of the van. We wanted to ensure we had enough storage underneath for our other camping, climbing, miscellaneous gear to fit since this is also our road-trip vehicle. We followed the basic setup as shown below, only we built ours as a complete box with nothing overlapping since our van is smaller.
Build Instructions
1. Measure your vessel (van, vehicle, yert, whatever!). Don’t forget about wheel wells, window sills, cup holder areas, whatever your particular vehicle contains, as it will determine if you need to make any adjustments to accommodate. Also keep in mind that we built our bed for function of traveling so maximizing storage space while having enough room for a comfortable setup as a bed were our primary goals.
2. Collect/gather all materials
3. Start with the bottom portion first (we created a base as it adds more stability and support).
4. Using a circular saw, divide your 2×4 studs for the foundation (make sure your measurements are correct).
5. Clamp the bottom plates using drill to pre-drill the holes, and wood screws to secure to the bottom. Use scrap wood for shims as needed.
6. Once the four corners (bottom plates) have been established, start building up the studs/jack studs according to your measurements. Ours were around 13″ and 15″ pieces that we screwed together, for the middle supports, and 15″ for the outer corners. The middle lintel piece was added for additional holding power.
7. Next, attach the two top plates, which are your longest pieces – theoretically this should all come together relatively seamlessly if you did measurements correctly. I suggest double and triple-checking to make sure everything fits together before screwing things in place. Because it is wood, it will not be perfectly straight, but its also very malleable, so you can use clamps and screws to make everything come together.
8. After you finish with the base, move on to the bed-surface plywood top. Lay the smooth side face-down and secure joist supports across with wood screws. We used 2×2 sized joists, but if you want extra holding power, you can use 2×4.
9. Once secured, place the plywood top on the bottom structure, and screw together corners/edges with 3″ screws.
10. Using a cheap roll of carpet, affix to the top with a staple gun or nails. We wrapped ours around the front and back portion so that the mattress topper would not fray.
Walaa! Congratulations, now you are done with the bed. Now all you need is a small mattress or mattress pillow. We use a 3″ memory foam topper wrapped in a waterproof/bug zip-up cover and duvet cover (brown-zebra striped). Super comfy!
Gallery
Here are some photos of the building process:
- Materials
- measuring
- secure bottom plate
- clamps are key
- attaching studs
- sanding
- attach lintel
- clamps
- drilling
This ended up being a really fun project. We learned a lot of basic carpentry skills and feel a lot more comofortable with the idea of building something ourselves. I, Jill, also got MUCH more comfortable using the power tools and we found that we worked really great as a team (although I guess we already knew this but its still nice to know we work really well together!)


So far its been a huge success! Thanks for your comments!
I am thinking about building one of these myself, thx for the info and motivation.
Looks like you did a great job with your Min-bed. Happy Trials! Rob and Patty